How to Change Water in Fish Tank: A Step-by-Step Guide
Is your fish tank water looking a bit murky?
Don’t worry – it’s time to give your fish some fresh, clear water. Changing the water in an aquarium is pretty simple when you have all the right steps and supplies handy.
With this easy-to-follow guide, you can easily learn how to change and maintain healthy water in your fish tank so that both you and your aquatic friends can thrive!
5 Key Benefits of Changing Water in Your Fish Tank
Changing the water in your fish tank regularly can provide several key benefits. In this table below, we’ve summarized the top five benefits of changing the water in your fish tank:
| Benefit | Explanation |
|---|---|
| Removes waste and toxins | Regular water changes help remove harmful waste and toxins that can build up in the water and harm your fish. |
| Maintains water chemistry | Regular water changes help maintain the proper pH balance and other important water parameters, which can help prevent diseases and other issues. |
| Reduces algae growth | Regular water changes help remove excess nutrients that can fuel algae growth, which can harm your fish and make your tank look unsightly. |
| Promotes good bacteria growth | Regular water changes help promote the growth of beneficial bacteria that can break down waste and keep your tank clean. |
| Refreshes the water | Regular water changes help refresh the water and ensure that your fish have a clean and healthy environment to live in. |
Signs of Poor Water Quality
Don’t be left guessing: Here’s a table of indicators that can help beginners know when to change the water in their fish tank:
| Indicator | Explanation |
|---|---|
| Water color | Cloudy, murky, or discolored water can be caused by excess waste and debris in the tank. A water change can help clear up the water and improve its clarity. |
| Water odor | A foul or ammonia-like odor in the water can indicate excess waste and toxins in the tank. A water change can help remove these harmful substances and improve water quality. |
| Algae growth | Excessive algae growth in your tank can be a sign of high nutrient levels and poor water quality. A water change can help remove excess nutrients and reduce algae growth. |
| pH levels | If the pH level of the water is outside of the recommended range for your fish, it can be harmful to their health and require a water change to rebalance the water chemistry. |
| Nitrate levels | High nitrate levels in the water can be a sign of excess waste and debris in the tank. A water change can help lower the nitrate levels and improve water quality. |
| Ammonia levels | High ammonia levels in the water can be toxic to your fish and indicate the need for a water change to remove excess waste and toxins. |
| Water hardness | Water that is too hard or too soft for your fish can cause stress and health problems. A water change can help adjust the water chemistry to the appropriate level. |
| Water temperature | If the water temperature is outside of the recommended range for your fish, it can cause stress and illness. A water change can help adjust the temperature and maintain a comfortable environment for your fish. |
| Water level | A low water level in the tank can disrupt the filtration system and oxygen levels, requiring a water change to top up the tank and maintain a healthy environment for your fish. |
EpicFishTank Note:
By paying attention to these indicators and using the appropriate testing tools, you can maintain a clean and healthy environment for your fish.
Recognizing Poor Water Quality through Your Fish’s Behavior
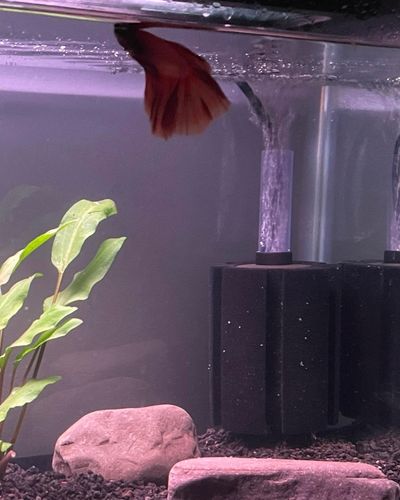
If you notice that your fish are staying at the top of the tank, it could be a sign of poor water quality or insufficient oxygen levels.
In this case, it’s important to test the water parameters to see if ammonia or nitrite levels are elevated or if the pH level is too low. If the water quality is poor, it’s time for a water change.
Similarly, if your fish are staying at the bottom of the tank and seem lethargic, it could also be a sign of poor water quality or insufficient oxygen levels.
In this case, it’s important to test the water parameters and make sure that the water is not too cold or too warm. If the water quality is poor, a water change can help to improve the situation.
EpicFishTank Note:
Lethargy, hiding, or reduced appetite in your fish can be a sign of poor water quality and indicate the need for a water change.
How to Easily Change Water in Fish Tank
With our step by step instructions and helpful tips, you’ll be able to change even large amounts of water quickly and safely – making sure all occupants come away unharmed. You won’t have to waste time searching for adaquate advice on how to do it – because we have it here just waiting for you.
Get Your Equipment Ready
Before starting the water change process, make sure you have all the necessary supplies and equipment ready.
| Tools | Uses |
|---|---|
| Water conditioner | Removes harmful chlorine and chloramine from tap water and detoxifies heavy metals and other harmful chemicals |
| Gravel vacuum | Cleans debris and fish waste from the substrate without disturbing the fish or plants |
| Algae scraper or magnet cleaner | Removes algae from the aquarium walls, keeping the tank clean and clear of unsightly buildup |
| Bucket | Used for collecting and disposing of old water and for filling the tank with fresh water |
| Sponge | Used for cleaning surfaces of the aquarium and equipment without scratching the glass or acrylic |
| Thermometer | Measures the temperature of the water to ensure it remains within the appropriate range for your fish species |
| Water test kit | Measures the levels of ammonia, nitrite, nitrate, pH, and other water parameters to monitor water quality |
| Gloves (optional) | Protects hands from chemicals, sharp objects, and skin irritation |
Change the Aquarium Water
When it comes to changing aquarium water, there are two common methods that can be used: The Gravel Vacuum Method and The Bucket Method. While both methods can be effective, there are some differences between them.
The Gravel Vacuum Method involves the use of a specialized tool to remove debris from the substrate. The Bucket Method is a simpler approach that does not require any special equipment.
In this comparison, we’ll take a closer look at the pros and cons of each method.
| Method | Gravel Vacuum Method | Bucket Method |
| Equipment needed | Gravel vacuum, siphon hose, bucket | Net or cup, bucket |
| Effectiveness | More thorough and effective at removing debris and waste from the substrate of the aquarium. Can help maintain the health of fish by removing harmful chemicals and toxins from the water. | May not be as effective at removing debris and waste from the substrate of the aquarium. May not be as effective at maintaining the health of fish by removing harmful chemicals and toxins from the water. |
| Time required | More time-consuming and requires more effort | Simple and quick |
| Cost | May require the purchase of additional equipment | No additional equipment required |
| Ease of use | Requires some practice and skill | Very simple and easy to use |
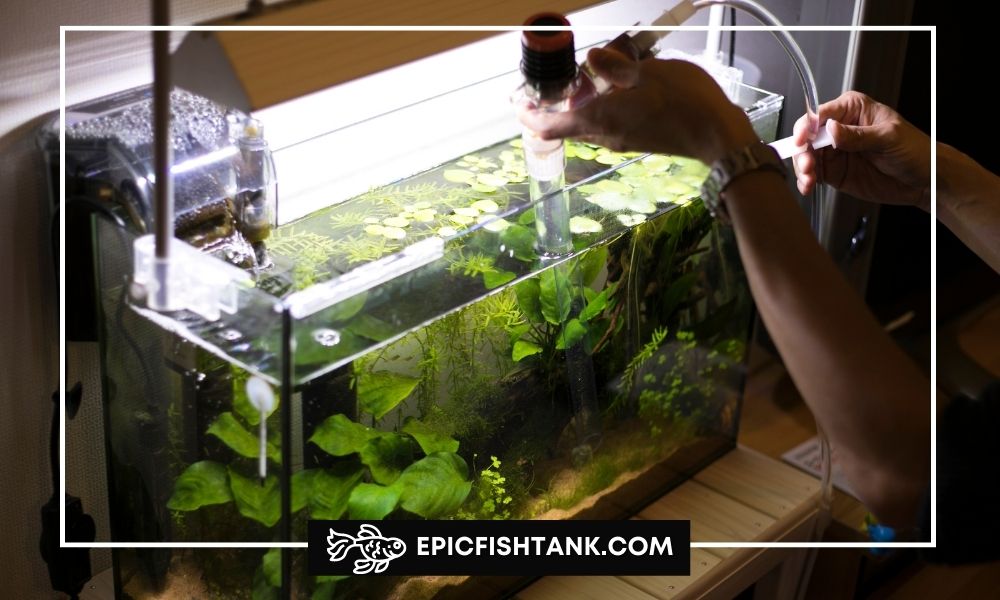
The Gravel Vacuum Method
Here is a step-by-step guide for using a gravel vacuum to perform a water change on your aquarium:
Step 1: Prepare your supplies. You will need a gravel vacuum, a bucket, and a siphon hose. Make sure the bucket is clean and designated for aquarium use only.
Step 2: Turn off any electrical equipment, such as heaters or filters, to avoid damage during the water change.
Step 3 Place the gravel vacuum in the aquarium and submerge the end of the hose into the bucket.
Step 4: Start a siphon by gently sucking on the end of the hose until water begins to flow out of the aquarium and into the bucket.
Step 5: Move the gravel vacuum around the bottom of the aquarium, making sure to stir up any debris that has settled on the substrate. The vacuum will suction up the debris and remove it from the aquarium.
Step 6: When the water level in the aquarium has dropped to about 20-25%, turn off the siphon by lifting the end of the hose out of the water.
Step 7: Refill the aquarium with fresh, treated water. Make sure the temperature of the new water matches the temperature of the aquarium water to avoid shocking your fish.
Step 8: Turn your equipment back on and monitor your aquarium for any changes in behavior or water quality.
In this YouTube video, He explains that it comes with various attachments and can be used to both remove and replace water in the tank. He demonstrates how to set it up and shows the device in action, highlighting its strong suction and efficient water transfer. He also notes that it is easier to use than traditional manual methods.
The Bucket Method
Here is a step-by-step guide for performing a water change using the bucket method:
Step 1: Gather your materials: You will need a clean bucket, an aquarium-safe hose, and a dechlorinator if using tap water.
Step 2: Turn off any equipment that could be damaged by a drop in water level, such as heaters and filters.
Step 3: Place the empty bucket on the floor near the aquarium.
Step 4: Insert the aquarium-safe hose into the aquarium, making sure it reaches the bottom.
Step 5: Start the flow of water by either sucking on the end of the hose or using a pump to start the siphon.
Step 6: Drain about 20-25% of the water from the tank into the bucket.
Step 7: Use a clean sponge or rag to wipe down the inside of the tank, removing any algae buildup or debris.
Step 8: Refill the tank with clean, fresh water, being sure to treat it with a de-chlorinator if using tap water.
Step 9: Monitor the water temperature to ensure it’s not too different from the aquarium temperature.
Step 10: Add any plants, decorations, or fish that were removed during the cleaning process.
Step 11: Turn your equipment back on and Monitor your aquarium for any changes in water chemistry or behavior in your fish.
The video shows how to do bucket water changes for a fish tank, which is a common problem for many fish keepers. The process involves turning off the fish tank lights, filter, and heat, unplugging the lights, removing the lid, and using a pump to speed up the process of filling and emptying five-gallon buckets.
FAQs
How Often Should You Change Aquarium Water?
The answer to this question depends on several factors, including the size of the tank, the type of fish you have, and what type of filtration system you use.
Generally speaking, it’s recommended that you do a partial water change (15-25%) once a week. This will help keep nitrate levels low and maintain a healthy environment for your fish.
Also Read: At-Home Care: How To Clean A Fish Tank
How long can a fish survive out of water?
When a fish is taken out of water, it will quickly begin to suffocate as its gills dry out and are unable to extract oxygen from the air.
During a water change, it is not necessary to remove fish from the tank, as long as the water level is not lowered too much.
Fish can typically survive in reduced water levels as long as they are not completely out of the water. If you need to completely drain the tank, it is best to temporarily move the fish to a separate container filled with fresh water and aeration to ensure their survival during the water change.
In general, it is best to avoid keeping fish out of the water for extended periods of time to prevent stress and harm to their health.
| Fish Species | Approximate Time Out of Water |
|---|---|
| Betta | Up to 1-2 hours |
| Tetra | Up to 10 minute |
| Guppy | Up to 10 minutes |
| Goldfish | Up to 1 hours |
| Snakehead | Up to four days (Source) |
EpicFishTank Note:
It’s important to note that these times are approximate and can vary based on factors such as the age and size of the fish, as well as the temperature and humidity of the surrounding environment.
It’s also important to avoid keeping fish out of water for extended periods of time to prevent stress and harm to their health.
Frequency of Water Changes by Tank Size
Here’s a table summarizing the recommended frequency of water changes by tank size:
| Tank Size | Water Change Frequency |
| Up to 10 gallons | 20-30% every week |
| 10-30 gallons | 25-35% every 1-2 weeks |
| Over 30 gallons | 30-50% every 2-4 weeks |
EpicFishTank Note:
It’s important to note that these guidelines are just a starting point, and the actual frequency of water changes may vary based on the specific needs of your tank. Regular water testing and observation of fish behavior and health can help determine the appropriate frequency of water changes for your aquarium.
Final Words
Congratulations! You’ve finished the process of changing the water in your fish tank. With each change you make, you are ensuring that your fish have a healthy, safe and happy environment to live and play in. Keep up the good work!
References
Time for a coffee break! With your support, We can keep working hard and creating fantastic content. #let's make it happen!
Author
Reza is a digital marketer and an avid freshwater aquarist. He's been keeping fish tanks for more than 10 years and has always been fascinated by the delicate balance of life in water.
Reza loves to share his knowledge about both digital marketing and fishkeeping with others, and he is always happy to help new aquarists get started in this rewarding hobby.
Wibisono is a freshwater fish breeder who raises and breeds different species of ornamental fish like betta, guppy, flowerhorn, and goldfish. He has been in the business since 2018 and exports his fish to different countries. He is committed to providing high-quality and healthy fish to his customers.
Leave a Reply